Years ago I attended a 'Super Saturday' in Salem with my sister. The Stake President's wife was there teaching a bread class. The lady was hilarious. She has such a large family that the art of bread-baking for her had become an all-out war. She combines her recipes in a 5-gallon bucket and incorporates them with a square plaster mixer attached to a cordless drill. No. Joke.
Her bread was d-i-v-i-n-e. I took the packet home and decided to try my hand at her white bread. Simple. Easy. A recipe I couldn't screw up. Well... I screwed it up. But in a good way!! To make a long story short, I added baking powder to the recipe (because the recipe called for sugar twice and I couldn't figure out what else would be in bread but baking powder - though my mom later told me that baking powder isn't usually found in basic bread recipes... I was clueless!) and what I ended up with was a wonderful, moist, yeasty bread that needed VERY little kneading and did most of it's rising in the oven while baking. Weird.
What I've noticed most about this bread, however, is the fact that even those who feel they're "hopeless" when it comes to bread-baking haven't been able to mess this recipe up!
This recipe is for master bread bakers and novices alike!!
What You'll Need:
7-8 cups of flour
2 T yeast
1/4 cup sugar
1 T baking powder
1 T salt
1 egg
2 1/4 cups milk
1/4 cup oil
First things first, mix together your milk and your oil. Put it in the microwave for around 2.5 minutes. You want the liquid to be on the hot side of warm.
Mix together ONLY 2 CUPS flour (I use a mixture of wheat flour, white flour, and sometimes ground flax for fun but it does well with any combination or even JUST white flour), the yeast, the baking powder, and the sugar. NOTE: You'll add the salt in a few minutes after the yeast and the sugar come back from their honeymoon.
Return to your liquid, give a good mixing aaaannnnd...
Add it to your dry ingredients.
Stir this mixture for about 2 minutes (as you can tell, I make my bread by hand. I have a Kitchen Aid, but I rather enjoy making bread by hand, so there.) Next, ADD THE SALT and mix again. Please don't forget the salt. This bread is pretty bland without the salt.
Add 1 egg...
And mix again!!
Okay, here's where the fun begins... add 2 cups of flour to your liquid mixture, and stir.
Add 2 more cups of flour, and at this point I clean the whisk and mix by hand - which means the rings come off ladies. I cannot COUNT the number of times I've had to pick dried dough out of my wedding ring.
This is the only kneading this bread will get... even though I'm left-handed, I use my right hand to knead. I knead for a minute, I add a little flour, I knead, I add. You may use all 8 cups of flour, but I HAVE NEVER HAD TO. I use 7 cups (2 in the beginning, 5 later) every time. You want your bread dough to be soft, but not sticky. Having said that, know that I have put a loaf of bread in the oven that WAS sticky, and it was fine. Don't stress over this.
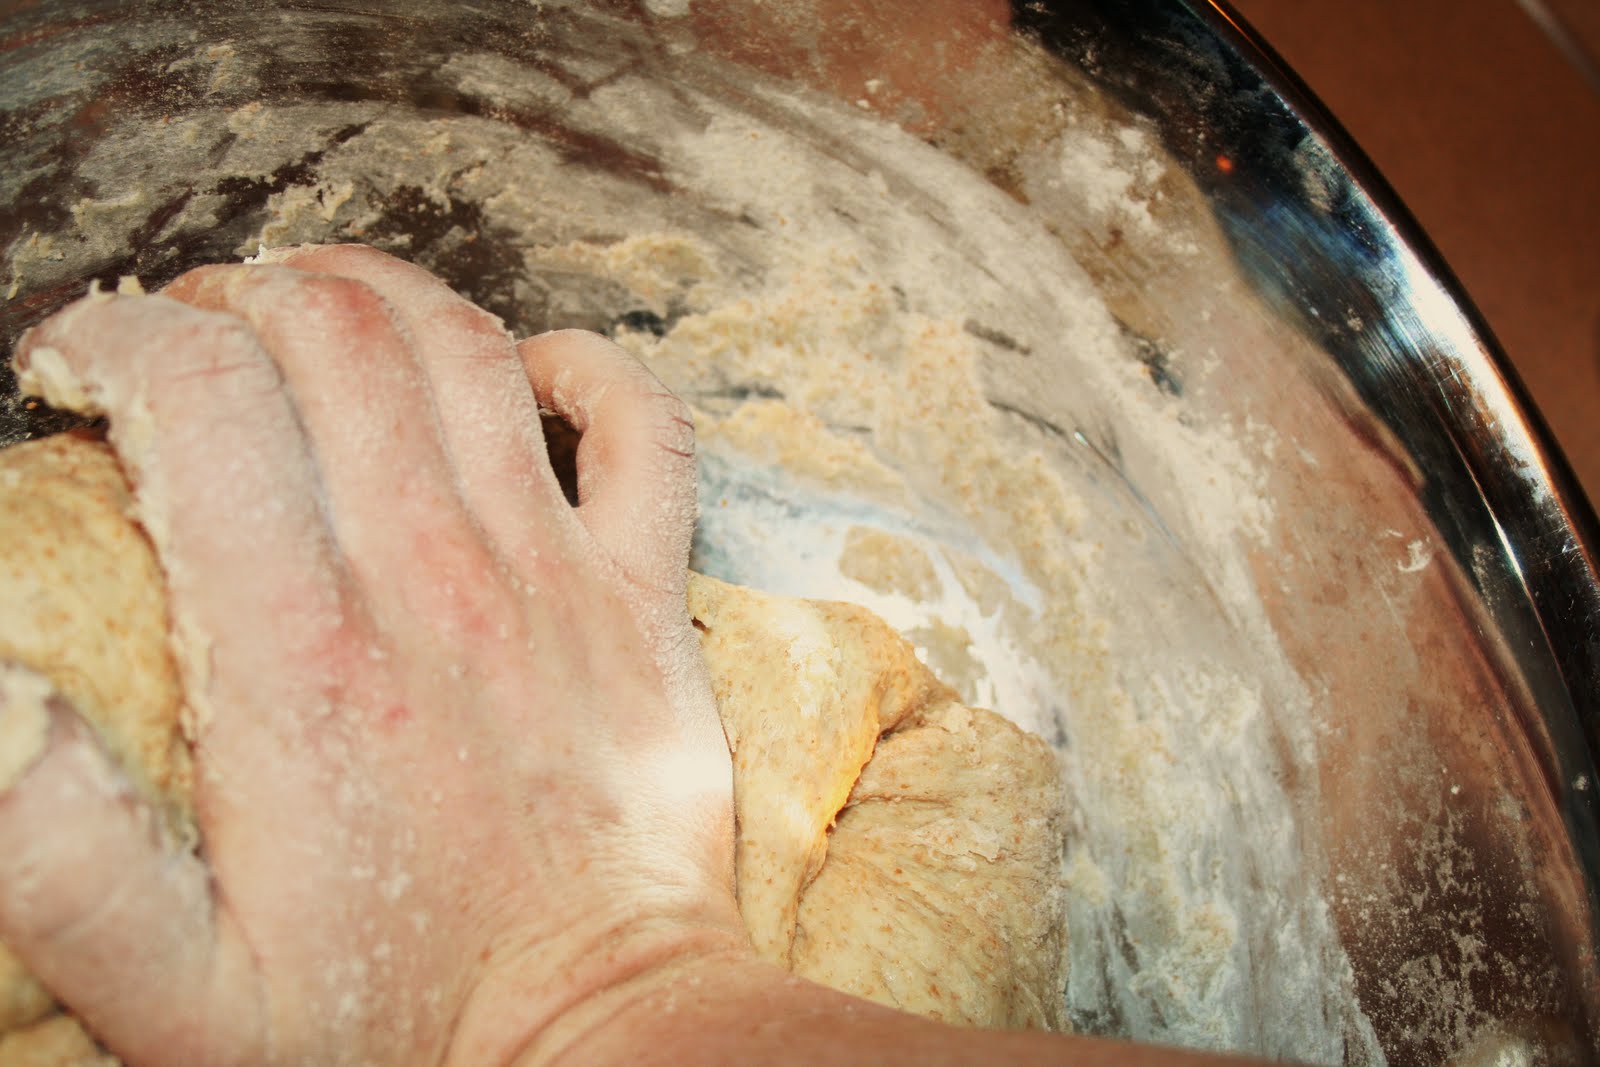
Here's how the kneading is done:
Scoop your hand under the edge of the bread...
Fold it over, and press down with your palm.
Repeat.
Continue to knead the bread until the flour is incorporated.
At this point, you should have a ball of dough that looks something like this.
Place it in an oiled bowl, cover it, and let it rise for about 30-40 minutes.
If your house is cold in the winter like mine, set your oven to 200 degrees (or your "warm" setting) and place the bread inside.
DON'T FORGET TO TURN OFF THE OVEN AFTER A FEW MINUTES. YOU WANT A WARM ENVIRONMENT, BUT YOU DON'T WANT TO COOK THE BREAD... YET!
Sometimes my bread doubles in size, sometimes it doesn't rise AT ALL. Don't give it another thought! It will be just fine. : )
Pinch your dough into two pieces...
Like so!
Form it into two loaves... I usually roll my on the countertop to get the cracks out of it. Sometimes, however, I chuck it right into the bread pan and give a good slap. It's not a science. I promise.
Place your dough into GREASED pans.
Mmmmmmm....
Let your dough rise in the pans (covered) for another 20 minutes or so. You'll notice that one loaf is a lot bigger than the other. Do not ask me why. It seems to happen every time. I've just accepted it. I'm not here to make uniform bread. Pppfff.
Oh and this is the point where you'll want to preheat your oven. 350, please and thank you!
Bake at 350 degrees F for uuuhhh... uummmmmm... around 20 minutes? Just bake it until the tops are golden brown. Sometimes my bread bakes longer than others... because I forget about it. I'm very busy. ; p
Sometimes it looks like this... golden brown and slightly unruly... Mmmmmm... every crumbly piece is heaven.
Sometimes it looks like this... straight, smooth, boring. Still tastes lovely!
The best part about this recipe is the fact that it makes 2 loves.
I mean loaves.
I love bread. : )
Moving on... it makes 2 loaves, which we all know is vital because 1 loaf will be g-o-n-e in 60 seconds if your family is anything like mine.
We like ours with homemade plum jam.... *drool*
And sometimes with honey... THIS is the only reason I can handle working our bees. They still scare me to death, but when the world goes to pot, I refuse to live life without the golden deliciousness.
The most important thing to remember about this bread is that, really, you'd have to try EXTREMELY HARD to mess this recipe up. I have made literally hundreds of loaves with this recipe, and have never thrown one away. So have fun! Here's to breader beginnings!!!


I love the idea of posting pictures along with your recipe so folks can see what things look like at the different stages of putting something together. Very helpful! Mmmm, plum jam! I just can't wait until summer-time!
ReplyDeleteOoooo, That sounds soooo yummy. I'll have to give it a try and test it's fool-proof-ness. Is that a word? Wish me luck. :o) By the way, I LOVE your blog.
ReplyDeleteI have been baking bread for a while and it comes out crumbly if you either need it too much or not enough. If you happen to get it somewhere in the middle it turns out great! Oh, and I always get one loaf bigger than the other too. Still tastes the same though, at least thats what my grandma always says! Thanks for the recipe.
ReplyDelete